Friday, September 28, 2018

All Things Pickled


We love pickles in my family, all kinds.  There is nothing better than homemade pickles and there's so many easy ways to make your own pickles.  Also pretty much every kind of fruit and vegetable can be pickled or made into a relish. My favorite is dill or sour pickles and bread and butter pickles but I also like other vegetables pickled as well. This summer, both of my daughters and I have been making and experimenting with different pickles on our own and comparing notes.  My oldest daughter, Tabitha, lives close by so we've been able to share jars back and forth which has been fun. I have several jars of refrigerator or quick pickles, cucumbers, radishes, and watermelon rind, plus a variety of fermented pickles and relishes.  I've been experimenting with fermentation and have made garlic paste, onion and sweet pepper relish and real dill pickles. My daughter, Aubree, bought me a book and fermentation kit several years ago and I've been having fun with it and now she's caught the fermentation bug and has been making her own pickles as well. This year, I've also canned several jars of dill pickles.  This post I'm going to mainly focus on quick or refrigerator pickles which are the easiest to do and do posts on canned pickles and fermented pickles and relishes in the future.
Radish quick pickles


Radish quick pickles
Basically pickles are made with a brine of either vinegar, salt and water or just salt and water.  Fermented pickles are made with a salt water brine put over cucumbers and allowed to set at room temperature for 7 to 10 days to ferment. Once fermented they are refrigerated for up to a year.  Canned pickles are made with a vinegar, salt and water brine, heated and poured over cucumbers and processed in a water bath.  They are then shelf stable for up to a year. Quick or refrigerator pickles is vinegar, salt and water added to vegetables and they are stored in the refrigerator and can be eaten within hours or a couple of days.  You can also use leftover pickle juice to make quick pickles.  If I have cucumbers left from what I've cut up for a salad or something, I just slice them up and add them to a jar of leftover pickle juice I keep in the refrigerator.  I just keep adding cucumbers until the jar is full.  They are quite tasty even by the next day.  I also made some radish quick pickles, just cut up fresh radishes I bought from the farmer's market and put in a jar of leftover pickle juice and put them in the refrigerator and they are fantastic.  I never throw out leftover pickle juice, there's so many uses for it.  Like I said, it makes easy and tasty quick pickles and is a way to preserve fresh produce, it can be drunk for leg cramps, used in a vinaigrette dressing or for a sauce or added to any kind of salad like potato, egg or tuna for an extra zing.  Here's Tabitha
recipe for Watermelon Rind Pickles:

Brine
1 cup of water
1 & 1/2 cups of (white) or (apple cider) vinegar can also use combination of different vinegars including balsamic or any kind of fancy vinegar
1 & 1/2 cups of white sugar (maybe 2 cups) can also substitute honey for part of sugar (1/2 and 1/2)
1 tsp. whole black peppercorns
1/2 tsp. red pepper flakes
3 tbsp. Kosher salt

juice from 1/2 a lemon
(You can also add 2 tsp. coriander seeds)

(Apple Cider Vinegar has a bit more bite and the white vinegar
is a bit smoother... especially when you use 2 cups of sugar.)

Mix and bring to a boil and simmer for one minute...

Remove from the heat and let cool for a couple minutes
then add 1 cup of ice cubes and stir until they are gone. Put cubed watermelon rinds in jars and pour the still warm (not hot) brine over the rinds and put lids on.  When completely cooled, refrigerate.  Let set at least 1 day before eating, the flavor will intensify the longer they set.


Fermented real dill pickles


So I hope this inspires you to make your own quick pickles, they really are super easy and so tasty.
Enjoy,
Bamah
Refrigerator pickles

Refrigerator pickles from leftover pickle juice

Canned dill pickles


Friday, August 31, 2018

Spaghetti Squash Fritters by Aubree Beckman

I have a treat this month. My youngest daughter, Aubree, has once again done a guest blog for me and shared her recipe for Spaghetti Squash Fritters. She's a wonderful cook and I'm a very proud mom.
Enjoy,
Bamah


Hello Again! It's Aubree once again guest blogging. For those of you who don't know, I follow a grain free diet for health reasons (mostly because I am intolerant to ALL grains), and this makes finding good recipes and things to cook... interesting. The following recipe is from a Facebook post my wonderful mother found and shared with me, and I've adapted it over the years. I have added the original recipe at the bottom if you wish to makes these non-grain free. I have also made these paleo with coconut milk cheese, and they were still tasty. Now, without further ado, here is my recipe for Spaghetti Squash Fritters.

Spaghetti Squash Fritters

First, you need to cook a spaghetti squash. The original recipe states you need 3 cups of cooked spaghetti squash, but I don't really measure it and basically mess with the mixture until I like it.
To cook a spaghetti squash: Cut it in half, spoon out the middle (and keep the seeds to roast later :) ), sprinkle the halves with some avocado oil (or olive oil). Place the 2 halves cut side down on a baking tray (you can line it with parchment paper, foil, or a silicone baking sheet to decrease chance of burning the squash).
Cook the Squash at 400 degrees for 45-60 min, until the outside is slightly brown and soft.
Take it out of the oven and let it cool before scraping out the insides with a fork or spoon. I sometimes do this the day before and put it in the fridge overnight. The original recipe says to wring out the squash, but I don't like to do that part, so I've adapted to allow for a little more liquid.

Once you are ready to assemble your fritters, you'll put all of these ingredients together in a bowel.
Ingredients:
 - 2 eggs
- 2/3 cup of almond flour
-1/3 cup of coconut flour
- 1 cup chopped fresh spinach or kale
- 1 tablespoon of Arrowroot starch
- insides of a cook spaghetti squash
-1/2 cup Parmesan cheese, grated (you can use other hard cheeses, but don't use a soft cheese like cheddar, it makes a mess)
- 1/2 lb of cooked bacon, chopped
-seasonings to taste - I use salt, pepper, onion, garlic, parsley
- avocado oil and coconut oil for frying the fritters at about a 50/50 ratio.

In a bowel, mix all ingredients together until you can form a good patty shape. I mix with my hands for a better consistency and to make sure I can feel the right texture. At this point, if I need to I add a pinch of coconut flour if it's still too runny.

In a skillet, heat oils to hot, but not burning (about medium- medium high heat depending on your stove), and drop patties in. I cook them about 2-3minutes a side flipping them once.

And that's it, they are ready to eat!
In the original recipe, they top them with Greek yogurt, but I've never needed something on top.

On a side note, I fry them in a combo of avocado and coconut oil, but I have also cooked them in butter/ghee or olive oil. I prefer a mix of the 2 above, but feel free to experiment.
- I also like to throw some diced onions and sweet/mild peppers in the mix, and like my mother, I like to add random veggies.

I have also cooked these in the oven at 350 degrees for about 20 min, and although they are still good, they are not as crispy.


Hope you enjoy!!!
Aubree

Tuesday, August 28, 2018

Eggplant and Potato Casserole

I love eggplant, it's considered a vegetable but it's actually a fruit.  It's so versatile and good for you.  My family is divided when it comes to eggplant, my husband and youngest daughter aren't fans but my oldest daughter, Tabitha and I love it.  I've been buying it at the farmers market for years, finely chopping or shredding it, keeping a baggie of it in the freezer and putting it almost everything I cook and since it's finely chopped it's indistinguishable.  It's a great way to stretch ground meat, it takes on the flavor of the meat it's cooked with. Tabitha and I have made stuffed eggplant before which we really liked but no one else would eat.  Recently, I saw a recipe on Cookist for an eggplant and potato dish that looked good so I tried it this weekend since Tabitha was home. It turned out so well and very yummy that I will defiantly be making this again.  The recipe called for the eggplant to be sliced, pricked with a fork and placed on a baking sheet and baked for 20 minutes to pre cook it.  The potatoes weren't pre cooked in the recipe and took about 45 minutes to get tender so next time I'm going to pre cook them along with the eggplant.  In the recipe video that I watched the eggplant, potatoes and cheese were all uniform sized and were put overlapping in a round baking dish and sliced like a pie when baked.  My vegetables were not uniform and I was using more of them to make enough for both Tabitha and I for lunches.  I layered mine in a rectangular baking pan starting with the eggplant, sliced block cheese, (I had bought a really nice herb cheese from the Norman Ok farmers market), potatoes, sprinkled olive oil and shredded cotija cheese and then did another layer. The recipe called for sliced scamorza (which is a type of mozzarella) and shredded Parmesan cheese but since I had the really nice block of herb blend and shredded cotija I just used that instead. You could really use any kind of cheese. I think a layer of sliced tomatoes would be good as well so next time I'm going to add them. I have jars of sofrito and fermented garlic paste in my refrigerator that I add to whatever I'm cooking so I added 1 teaspoon of each to the first layer when I drizzled the olive oil on.  It just gave it added flavor but there were a few pockets of garlic so next time I'm going to mix them in with the oil then add on top of the potatoes.
Here's the recipe:
Eggplant and Potato Casserole
3 to 4 medium to large eggplants, round ones work better, sliced 1/4 inch
6 to 8 new potatoes, sliced 1/4 inch
8 oz. block or ball of cheese, any flavor, like cheddar or mozzarella, (I used a herb blend),sliced
2 cups shredded Parmesan or cotija cheese
seasoned salt and Italian blend seasoning (I used Tastefully Simple Rustic herb seasoning)
4 T olive oil
1 t. sofrito, optional added to olive oil


Slice eggplant 1/4 inch thick, prick a couple of times with a fork.  Also slice potatoes 1/4 inch thick.  Place eggplant and potatoes on separate baking sheets, sprinkle with seasoned salt and Italian blend seasoning and bake at 350 for 20 minutes to par cook.  Let cool slightly. In baking dish, layer eggplant, sliced cheese and potatoes starting with eggplant.  Mix olive oil and sofrito (I added garlic paste as well) and sprinkle 1/2 over potatoes. Sprinkle 1/2 shredded cheese and repeat layers topping with shredded cheese.  Bake at 350 for 30 to 45 minutes or until potatoes are done.
Optional, a layer of sliced tomatoes.


Enjoy,
Bamah


Friday, July 13, 2018

Homemade Stock and Broth

I've been making homemade stock and broth for years and freezing it for later use. Homemade stock is so easy to make and tastes so much better, plus has less salt than the box or canned type from the grocery store.  I've pretty much used the terms stock and broth interchangeable but they are actually two different things.  I looked up online the difference so here's a little lesson on the difference. 


Stock is made by simmering a combination of animal bones, a mixture of vegetable scraps of onions, carrots, celery and garlic in water.  Stock always involves bones and is cooked anywhere from 2 to 6 hours on the stovetop. Stock is always left unseasoned. Broth is any liquid that has had meat cooked in it.. It is made by simmering meat and celery, onions and carrots in water for a relatively short amount of time, usually under 2 hours, where the meat and vegetables can be eaten or used for dishes such as soup or a casserole. Unlike stock, broth is typically seasoned. They both are used for sauces, gravies, stews and soups.


The general consensus is stock is made with bones and broth is made with meat. Vegetable stock is made with vegetable scraps that are discarded after cooking and broth is the leftover liquid when cooking vegetables. I mostly make stock but I season mine like broth. I've made lamb, beef, chicken, turkey and vegetable stock.  I just keep a gallon size Ziploc baggie in the freezer and add vegetable scraps to it when I'm cutting stuff up from what I've bought at the farmers market and when I have a full bag, I make stock with whatever I have.  I also have kept bones in the freezer, turkey carcass  left over from Thanksgiving, T bone steak bones and lamb bones I got from the farmers market until I had time and enough vegetable scraps to make stock.  I've also just made vegetable stock, especially if I have an abundance of vegetable scraps especially greens from turnips and beets. I put bones and vegetable scraps in my large pot with cold water, bay leaves, a little seasoned salt and pepper or pepper corns, sometimes a little dried herbs or fresh herbs from my garden.  I cook it on the stove top for at least 2 hours, cool then strain out the bones and vegetables and put stock in a crock pitcher or large canning jars to cool completely in the refrigerator.
lamb bones
The next day or a couple of days later, skim off fat on top, stir stock and I put mine in quart freezer bags, double bagged and freeze. It can also be frozen in ice cube trays. The bones and vegetable scraps can also be roasted for richer flavor.  I usually just throw everything in frozen and cook it for several hours until the stock is dark and tasty. Here's the recipe:
Basic Stock Recipe
lamb, beef, chicken or turkey bones
1 onion, quartered or onion scraps
any type of vegetable scraps, such as celery leaves, potato or carrot peelings, turnip, beet greens, cabbage leaves or core
2 or 3 bay leaves
1 or 2 cloves of garlic
4 whole black peppercorns or 1 t. pepper
1 t. seasoned salt
1 to 2 t of any fresh or dried herb such as parsley, sage, basil, rosemary or thyme
cold water


In large stock pot, add bones, vegetable scraps, seasonings and cover with cold water, (start with COLD water to extract the most flavor from the bones and vegetables). Bring to a boil, reduce heat and simmer for 2 to 3 hours.  Let cool for awhile. Lift out bones with a slotted spoon and remove any meat for another use and discard bones.  Strain the stock through a mesh strainer into a glass pitcher or container and chill in refrigerator, discard vegetables.  Lift off solidified fat and store in refrigerator for a few days or freeze in containers, freezer bags or ice cube trays for up to 6 months.


Enjoy,
Bamah


Baggie of vegetable scraps


before cooking
finished broth

Tuesday, July 3, 2018

An Original Farmers Market Fan Girl

This past Saturday my husband and I went to Oklahoma City to spend the day with our oldest daughter, Tabitha.  The plan was to go to several farmers market, see a movie and go out to eat. It really was a day of farmer's markets.  Before leaving town, we went to our local Lawton farmer's market to get breakfast, produce and visit friends, farmer's market #1. I had worked last Saturday so missed the farmer's market and it's peak season so I wanted to check ours out first before heading to OKC.  I tried to contain myself and not buy too much but it was really hard, so many fresh produce to select from especially tomatoes.  Tomatoes are one of my absolute favorite summer fruit to preserve and cook with.  I'm a tomato snob and only like fresh tomatoes and don't buy them from grocery stores.  I'm growing my own tomatoes as well and this is the best year I've had so far. We dropped our dog, Clapton, and our purchases off at the house and headed out of town.  Clapton loves the farmer's market as much as I do and is a big hit there getting lots of pets from his friends.  We met Tabitha at the OSU OKC farmers market,  on 400 N Portland Ave, farmers market #2.  This is a year round indoor market on Saturdays from 8am to 1 pm. I've been here before and it's a great market with all kinds of local products, plants, meat, baked goods, dried teas and herbs, live music and more.  Tabitha shops here frequently and has her favorite vendors she buys from so it was fun her sharing that with me. I've passed on my love of farmers market, eating local and cooking from scratch to both of my girls. Tabitha calls me a farmers market tourist and this weekend she posted that I'm the original farmers market fan girl since I've been taking them to farmers markets and fruit stands their whole lives. I bought fresh corn, dried tea, spices, dried beans, fruit and more. I got really excited about the dried beans and Tabitha laughed at me and said I was cute but when I can replace something that I normally buy from the grocery store with a local option, that's exciting to me. We took our purchases back to her apartment and my husband stayed there while Tabitha and I checked out  farmers market #3 in the OKC farmers market district. Located in the historic OKC farmers public market building this is an indoor, year round market open on Saturdays from 9 to 2.  It's on 311 S Klein Ave off of Reno. It has produce, meat, handmade goods, honey, baked goods and more.  We got baked goods, cantaloupe, some amazing chicken and goat sausage, cabbage and more. Tabitha shops here but I had never been before so it was fun checking out a new place. We saw plants and produce around the corner on 211 S Ellison Ave so checked out Pam's Plants and Produce as well, open daily from 8:30 to 5:30, market #4. I had not bought plants at any of the other markets but they had a rose moss with really pretty flowers that's a different variety than what I have so I bought 2 to put on my porch. I also got green beans and watermelon.  The watermelon was from Texas since it's too early for ours yet but I've been really wanting watermelon so figured that was local enough. We were hot and tired so headed back to her apartment.  Another great place in that area is the Urban Agrarian on 1235 SW 2nd St.  We've shopped there before but didn't this last time since we had so much stuff already. They work directly with farmers and offer local produce, eggs, dairy, meat and locally prepared foods.  They are open on weekends and sell at various farmers markets including Norman, Edmond and across from St Anthony's  Hospital.  We had a great day with Tabitha, farmers market shopping, going to a movie and out to eat for dinner then headed home. Sunday afternoon I started cutting up my produce and made a big pot of green beans and new potatoes with ham, all products of farmers markets and one of my favorite summertime meals. My recipe is on another blog post. So that's a day with a  farmers market addict, tourist, fan girl, and a very happy woman.
Enjoy,
Bamah


OSU OKC farmers market
Tabitha said this is me in my natural habitat
Pam's plants and produce

Pam's plants and produce


OKC farmers public market
Green beans and new potatoes with ham
OKC farmers public market

Friday, June 22, 2018

Beet butter

I'm a lifelong lover of beets.  Fresh beets are now in season at the farmer's market and I have a hard time resisting buying them.  Unfortunately, none of my family like beets, they refuse to eat them and unlike other vegetables like eggplant, I can't hide them in dishes I make because of their bright red color.  I do use the beet greens in sofrito, soups, pesto or added to other greens in a recipe I'm making for my family.  Usually, I roast beets and eat them on the side of whatever I'm making or on top of a salad.  I found a recipe for beet relish and have made that for several years, processing them in a water bath canner, but again I have to find people who like beets to share the many jars I make.  This year I found a recipe for beet butter, a sandwich spread or dip, and made it this week.  I had bought beets at the farmer's market for several weeks and had cut them up and put them in a container in the refrigerator and kept adding to the container until it was full, about 4 cups of chopped beets.  The beet butter is really yummy, and easy to make especially with a food processor to puree it all together.  The recipe called for
macadamia nuts but I had shelled sunflower seeds so used those instead.  Since the sunflower seeds are so salty, I did not add additional salt.  I put the finished beet butter in a container in the refrigerator for myself, shared some with a coworker that's also a beet lover and put the rest in the freezer in serving side bags. I also made a yummy wrap for dinner with beet butter, ham, cheese, lettuce and spouts. Here's the recipe:


BEET BUTTER RECIPE


4 c chopped beets
2 c sunflower seeds or macadamia nuts
4 T vegetable oil, or grapeseed, any natural tasting oil
4 T maple syrup
3 to 4 T honey
dash of pepper and parsley


In a medium pot, cook beets in lightly salted water until fork tender, 15 to 20 minutes.  Drain beets and set aside to cool for a few minutes.  In a food processor combine nuts/seeds, oil, syrup, honey, vanilla and seasonings. Process until smooth.  Add cooked beets and continue to process until beet butter is completely smooth, scraping down the sides of the food processor as needed. Taste and adjust seasonings and texture (adding more oil or syrup) as needed.  Allow the mixture to cool to room temperature before serving. Enjoy it with crackers, toast, as a sandwich spread, or as a dip for vegetables.  Can be stored in airtight container in the fridge for up to 1 week.  Makes about 3 to 4 cups.  I froze the extra in 1 cup servings in freezer bags.


Enjoy,
Bamah

Wednesday, June 13, 2018

A family tradtion of sewing


This month I'm adding family memories to my blog posts.  Several things that I've read and heard recently have impressed upon me the importance of writing down memories and stories, especially those concerning family members that have passed away.  My mother has dementia so her memory is not reliable anymore and we don't really have a good documented family history.  For many of my deceased relatives, I'm the last one to remember them, their stories and to write them down. One of my goals this year is to write these family stories down in a journal for my daughters and I'll also be sharing some of them here in my blog.  I come from a long line of women who sewed for their family and taught the next generation how to sew as well.  My maternal great-grandmother, Bamah Masters, called Mammaw, who I was named after, sewed clothes for her 4 children and my mother, who she helped raise when my grandfather passed away. She had a stoke when I was young so I have no memories of her speaking or being active but heard stories about her from my mother and grandmother. She was an accomplished seamstress, making suits for her daughters and a winter coat for my mother. My mother once asked her if she loved sewing since she did it so well and her answer was not really.  She saw it more as a chore that needed to be done. She taught her 2 daughters, my grandmother and Aunt Dorothy how to sew and they both sewed their whole lives including sewing clothes for me. Grandma also taught me how to sew.  She felt similar to her mother about sewing.  She didn't really love doing it but saw it more as a necessity. My mother was also taught how to sew but she never could manage a sewing machine very well so didn't really make clothes.  She could hand sew and did beautiful work that way.  Aunt Dorothy loved to sew and was the best seamstress of them all. She could just look at a picture and copy it to make a dress without a pattern. My mother told stories of how if she loved one of her paper doll outfits, Aunt Dorothy would make a dress like it for her.  One of my favorite memories of Aunt Dorothy was when she made me dresses for school.  My family was living in California when I was really young and before school started for my kindergarten and first grade years (maybe second grade as well, I don't remember) a box would come for me from Oklahoma.  Inside the box would be 6 dresses, 5 for school and 1 for Sunday.  I got so excited and immediately tried them all on, my own little fashion show. They were all a basic A-line pattern, sleeveless, cotton dresses in various colors, all decorated with ribbon, rick rack or buttons, with or without pockets. I'm pretty sure a least one had a collar making it a sailor dress, I always had at least 1 sailor dress for school growing up. The Sunday dress was always a little different, making it special.  It was still an A-line pattern but with a waist and a belt or sash, usually a wide ribbon, most of the time velvet ribbon. I remember wearing one of those Sunday dresses that was a lavender floral print with a lavender velvet ribbon sash.  After church we went out to eat and the waitress spilled something all over me and it ruined the velvet ribbon.  I was so upset that Aunt Dorothy sent me another ribbon sash to replace it.  I also got a Christmas dress sent the first part of December.  I was always excited to receive those boxes of dresses, handmade just for me.  I was so proud to wear them and told anybody who'd listen that my Aunt Dorothy from Oklahoma made them for me.  It was just like Christmas. I love to sew and have taught both of my daughters how to sew.  I believe my youngest, Aubree, has taken after Aunt Dorothy for she is an excellent seamstress and has surpassed her sister and I. We have an extensive fabric collection including pieces inherited from Grandma and Aunt Dorothy.  I'm so thankful for these wonderful women in my life and the legacy they have left behind of sewing and so much more. 
Aunt Dorothy and Mom (Dorcas)
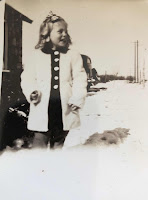
Memories are meant to be shared. And speaking of memories, another one of my goals is to go through and organize  many, many years of family photographs.  My daughter, Tabitha, is helping me with that so I'm sharing some of my mother's pictures from the mid 40's and 50's that we recently went through. The pictures of my mother in the little white winter coat is the one her grandmother, Mammaw, made for her.  The top picture is of Grandma, Mom and Aunt Dorothy sitting on the front porch of their home in Marietta, OK.  I'm pretty sure they made the clothes themselves since I recognize the fabric from Grandma's blouse. The picture of Mom and Grandma taken in the 50's is one of my favorites. It's in pretty bad shape but Tabitha manage to scan it and clean it up. I also recently found my baby book and had to put the pictures back in that had come out.  I have a photo of my great-grandma, Bamah, holding me when I was a year old. Bamah holding Bamah, priceless.
Enjoy,
Bamah


Little Dorcas and her homemade coat
Another shot of coat to include hat

One of my favorite pictures of Mom and Grandma

My great-grandmother, Bamah, holding me